Device Manager
The CharaChorder Device Manager is the one-stop-shop for users with a CCOS-powered device. It boasts high quality graphics, animations and a simple user interface. On the device manager, you can change your device’s layout, manage your chord library, and adjust your settings.
In this section, we’ll talk about the device manager and how you can navigate around it to configure your device to your liking. First, we’ll discuss the website and where to find useful buttons on it, then we’ll cover the main pages on the device manager and how to use them, and, lastly, we’ll touch upon some other features and useful tools on the manager.
Feel free to use the links below to skip to whatever section you would like to read or scroll to start with the first section.
Connecting to the Device Manager
You can follow the steps below to connect to the device manager for the first time.
Note
If you have connected this device from this browser before, you can skip the serial port permission popup: click “Connect” and choose your device from the Recent Devices list instead.
On a chromium based browser, such as Chrome or Edge, go to the CharaChorder Device Manager
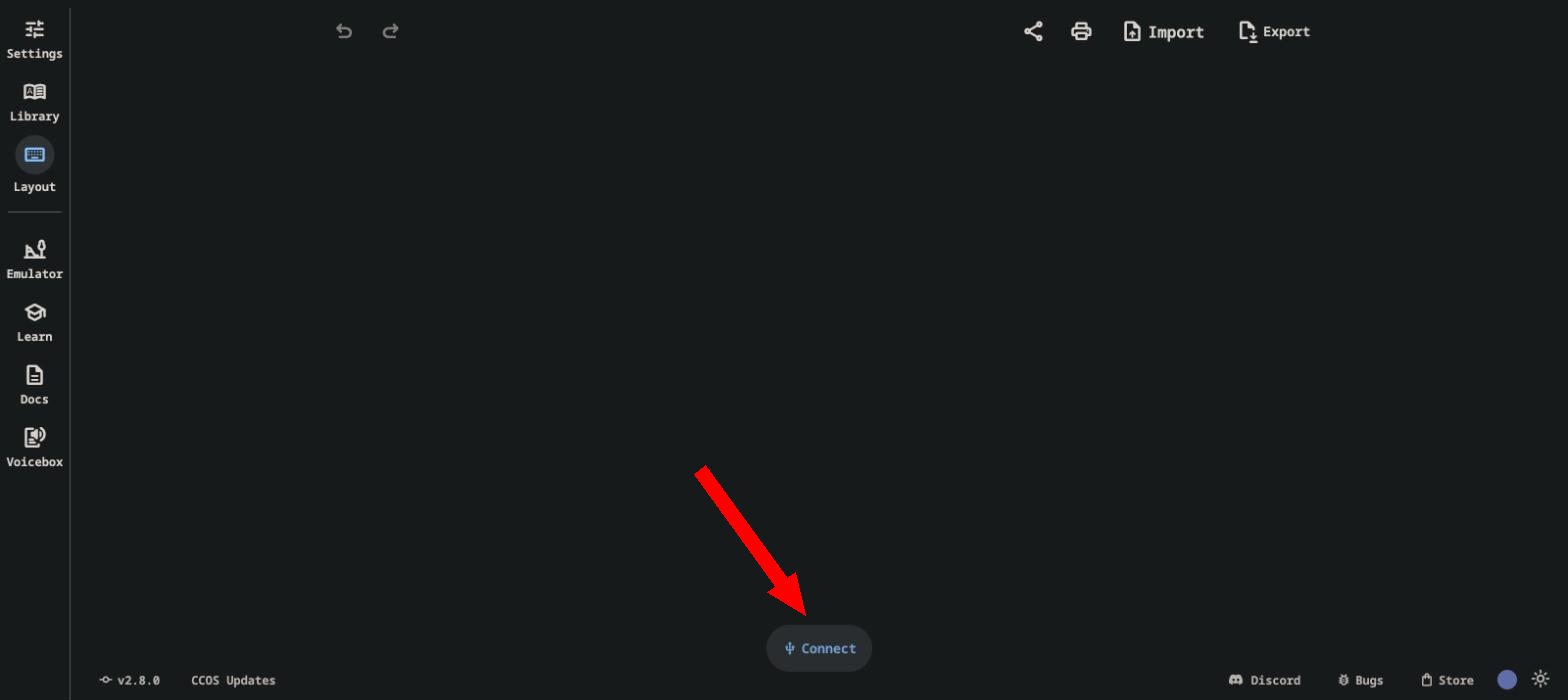
Click “Connect” at the bottom center of the screen
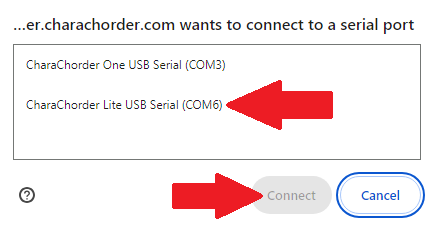
When the popup box comes up that reads “charachorder.io wants to connect to a serial port”, choose your CharaChorder device, then click the “Connect” button
If these steps were performed correctly, you can see the connected device name in the bottom bar where “Connect” was previously.
Once you’ve connected a device this way, the browser remembers it. The next time you click “Connect”, you’ll see a “Recent Devices” list with that device already in it – click its name to reconnect without going through the serial port permission popup again.
Connect Dropdown Options
Clicking “Connect” opens a dropdown alongside the Recent Devices list with up to three toggles:
Auto-connect – only shown once exactly one device is in your Recent Devices list. When enabled, the Device Manager reconnects to that device automatically as soon as the page loads, without you needing to click “Connect” or pick it from the list.
Fast Connect – shown alongside Auto-connect, under the same one-device condition. Caches your device’s data locally in the browser so the next connection loads faster; turn it off if you’re using a shared or public computer, since it leaves that cached data on the machine.
WebUSB Fallback – always shown. Forces the Device Manager to talk to your device over WebUSB instead of the browser’s native Web Serial API. Try enabling this if you’re having trouble connecting normally. It’s forced on automatically (and the checkbox disabled) in browsers that don’t support Web Serial at all.
Linux Serial Port Access
Warning
For Linux based users: serial port access is often restricted to specific user groups for security. To enable serial port access in a browser like Chromium, you’ll need to add your user to the appropriate group based on your Linux distribution. Follow the steps below to grant access.
For Ubuntu, Debian, Fedora, Linux Mint, openSUSE, CentOS, Elementary OS, Zorin OS:
sudo usermod -aG dialout $USER
For Arch Linux, Manjaro:
sudo usermod -aG uucp $USER
Replace $USER with your username or use $USER to automatically reference the current user.
Log out and log back in for the changes to take effect.
If the above commands don’t work, check the group ownership of the serial device (e.g., /dev/ttyUSB0) using:
ls -l /dev/ttyUSB0
This command will display the device’s group. Replace /dev/ttyUSB0 with the appropriate device file for your system.
After identifying the group (e.g., dialout, uucp, or another), add your user to that group using:
sudo usermod -aG <group_name> $USER
Replace <group_name> with the name of the group displayed in the previous step.
Log out and log back in to apply the changes. Your user will now have the necessary permissions to access the serial port.
Device Manager Website
The device manager comes with a navigation menu on the left hand side of the screen. Otherwise, regardless of what page you are on, there are a few helpful buttons you should know about.
Connect / Device name
The bottom center of the screen is where you connect to your device and see which you are connected to, as well as other info such as the site version and your device’s CCOS version.
Undo and Redo

Near the top left corner, the device manager has handy undo and redo buttons which do exactly what their names describe. If you’re making changes to your layout, your chords, or your settings, you can step back, one change at a time, all the way back to the very first change that you made during that session. Once you’re stepped back, you can step forward to redo the change(s) that was/were undone.
Color Scheme
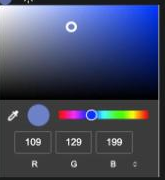
On the bottom right of the device manager, you’ll see a circle with a solid color. Hovering over this circle will reveal the label “color scheme.” You can click this circle to change the color scheme of the device manager. In the color scheme menu, you can choose your preferred color using a color palette, an RGB color system, or by clicking the dropper icon to choose a color on your screen.
Light and Dark Mode
Also in the bottom right-hand corner, you’ll find a sun or moon icon where you can toggle between light and dark mode. This toggle can help those who would rather have a brighter screen to see better or a darker screen to reduce eye strain.
Apply Button
If you make changes in the library, the layout editor or the device menu, a colored “apply” button will pop up on your screen, towards the top left corner.
Note
Your changes will not take effect until you click the apply button.
Device
The Device Tab is the place where you can configure most settings of your connected CCOS device and create backups. Read on to see the different settings you can change. You can find more detailed explanations in the GTM section.
Keyboard
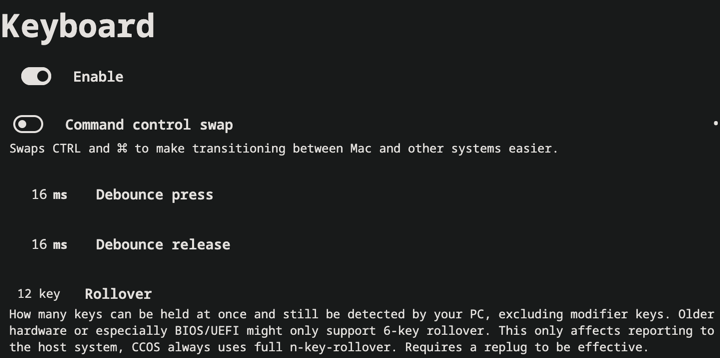
In this box, you can adjust settings relating to CCOS’ keyboard input, or turn keyboard input off altogether.
Enable
Turns the device’s keyboard input off entirely. Chording and mouse input, controlled by their own “Enable” toggles below, keep working independently of this one.
Command Control Swap
Swaps the CTRL and GUI (Command on Mac) keys, to make transitioning between Mac and other systems easier.
You can read a more in-depth explanation in the GTM section.
Debounce Press
The debounce press setting refers to the time frame (measured in milliseconds) in which CCOS will filter out duplicate key activations on a press event.
You can read a more in-depth explanation in the GTM section.
Debounce Release
The debounce release setting refers to the time frame (measured in milliseconds) in which CCOS will filter out duplicate key activations on a release event.
You can read a more in-depth explanation in the GTM section.
Rollover
How many keys can be held at once and still be detected by your PC, excluding modifier keys. Older hardware or especially BIOS/UEFI might only support 6-key rollover. This only affects reporting to the host system; CCOS always uses full n-key rollover. Requires a replug to be effective.
Device |
Default |
Min. Value |
Max. Value |
Increments |
|---|---|---|---|---|
CharaChorder One |
12 key |
— |
— |
— |
CharaChorder Lite |
12 key |
— |
— |
— |
CharaChorder X |
12 key |
— |
— |
— |
CharaChorder Two |
12 key |
— |
— |
— |
CharaChorder Engine |
12 key |
— |
— |
— |
Master Forge |
12 key |
— |
— |
— |
Available options: 6 key, 12 key, 18 key
Mouse
Mouse???
CCOS has mouse functionality. This means that your CharaChorder, or CCOS-powered keyboard, has the ability to control your computer’s mouse. These settings affect the mouse usage on your CharaChorder.
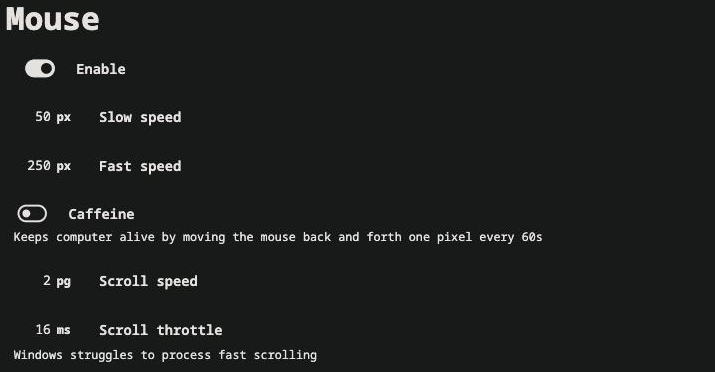
In this box, you can adjust settings relating to CCOS’ mouse abilities.
Enable
Turns the device’s mouse functionality off entirely.
Mouse Speed(s)
CCOS has two mouse speeds, a fast speed and a slow speed. The slow speed is activated when you use only one of the mouse keys in a single direction (as opposed to using 2 keys in the same direction). The fast speed is activated when you use two mouse keys in a single direction (as opposed to using only one key in the same direction).
You can read a more in-depth explanation of mouse speeds in the GTM section.
Scroll Speed
Scroll speed refers to the speed at which your CCOS scroll will scroll.
You can read a more in-depth explanation of the scroll speed in the GTM section.
Scroll Throttle
Scroll throttle sets the shortest time CCOS will leave between two scroll events. It exists because Windows struggles to process fast scrolling: without a gap between the events, some of them are dropped and the page scrolls less than you asked for.
Increase this setting if scrolling is unreliable on your computer. Lower it if scrolling feels sluggish and your computer keeps up with it.
Device |
Default |
Min. Value |
Max. Value |
Increments |
|---|---|---|---|---|
CharaChorder One |
16 ms |
0 ms |
255 ms |
1 ms |
CharaChorder Lite |
16 ms |
0 ms |
255 ms |
1 ms |
CharaChorder X |
16 ms |
0 ms |
255 ms |
1 ms |
CharaChorder Two |
16 ms |
0 ms |
255 ms |
1 ms |
CharaChorder Engine |
16 ms |
0 ms |
255 ms |
1 ms |
Master Forge |
16 ms |
0 ms |
255 ms |
1 ms |
Caffeine
Caffeine nudges your mouse cursor one pixel every minute or so (not a specific timing). This setting can be used to keep your computer from going to sleep. You might turn this setting off if you notice desktop apps are preventing you from getting mobile notifications (for example on Discord or Microsoft Teams).
Gaming

Layer Warp
Re-presses held keys with their new layer’s mappings when you switch layers while still holding them down.
Device |
Default |
Min. Value |
Max. Value |
Increments |
|---|---|---|---|---|
CharaChorder One |
0 |
0 |
1 |
1 |
CharaChorder Lite |
0 |
0 |
1 |
1 |
CharaChorder X |
0 |
0 |
1 |
1 |
CharaChorder Two |
0 |
0 |
1 |
1 |
CharaChorder Engine |
0 |
0 |
1 |
1 |
Master Forge |
0 |
0 |
1 |
1 |
Fuzzy modifiers
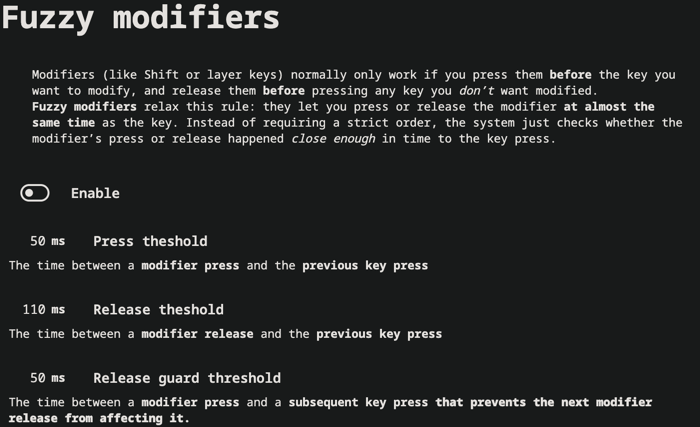
Modifiers (like SHIFT or a layer key) normally only work if you press them before the key you want to modify, and release them before pressing any key you don’t want modified. Fuzzy modifiers relax this rule: they let you press or release the modifier at almost the same time as the key, checking whether the modifier’s press or release happened close enough in time to the key press instead of requiring a strict order.
Enable
Turns fuzzy modifiers off entirely. The three thresholds below have no effect while this is off.
Press theshold
The time between a modifier press and the previous key press.
Device |
Default |
Min. Value |
Max. Value |
Increments |
|---|---|---|---|---|
CharaChorder One |
50 ms |
0 ms |
255 ms |
1 ms |
CharaChorder Lite |
50 ms |
0 ms |
255 ms |
1 ms |
CharaChorder X |
50 ms |
0 ms |
255 ms |
1 ms |
CharaChorder Two |
50 ms |
0 ms |
255 ms |
1 ms |
CharaChorder Engine |
50 ms |
0 ms |
255 ms |
1 ms |
Master Forge |
50 ms |
0 ms |
255 ms |
1 ms |
Release theshold
The time between a modifier release and the previous key press.
Device |
Default |
Min. Value |
Max. Value |
Increments |
|---|---|---|---|---|
CharaChorder One |
110 ms |
0 ms |
255 ms |
1 ms |
CharaChorder Lite |
110 ms |
0 ms |
255 ms |
1 ms |
CharaChorder X |
110 ms |
0 ms |
255 ms |
1 ms |
CharaChorder Two |
110 ms |
0 ms |
255 ms |
1 ms |
CharaChorder Engine |
110 ms |
0 ms |
255 ms |
1 ms |
Master Forge |
110 ms |
0 ms |
255 ms |
1 ms |
Release guard threshold
The time between a modifier press and a subsequent key press that prevents the next modifier release from affecting it.
Device |
Default |
Min. Value |
Max. Value |
Increments |
|---|---|---|---|---|
CharaChorder One |
50 ms |
0 ms |
255 ms |
1 ms |
CharaChorder Lite |
50 ms |
0 ms |
255 ms |
1 ms |
CharaChorder X |
50 ms |
0 ms |
255 ms |
1 ms |
CharaChorder Two |
50 ms |
0 ms |
255 ms |
1 ms |
CharaChorder Engine |
50 ms |
0 ms |
255 ms |
1 ms |
Master Forge |
50 ms |
0 ms |
255 ms |
1 ms |
Chording
What is Chording?
Chording is the beautiful ability of pressing multiple keys at a time to get a predefined output, whether it’s a single word, an entire phrase, or important addresses.
A chord is a type of input/output action on a keyboard: you press two or more keys at the same time and release them at the same time, after which a predefined output will replace the originally pressed keys.
By chording, we are able to type one word at a time instead of one letter at a time. It’s even possible to have chords for phrases and entire sentences.
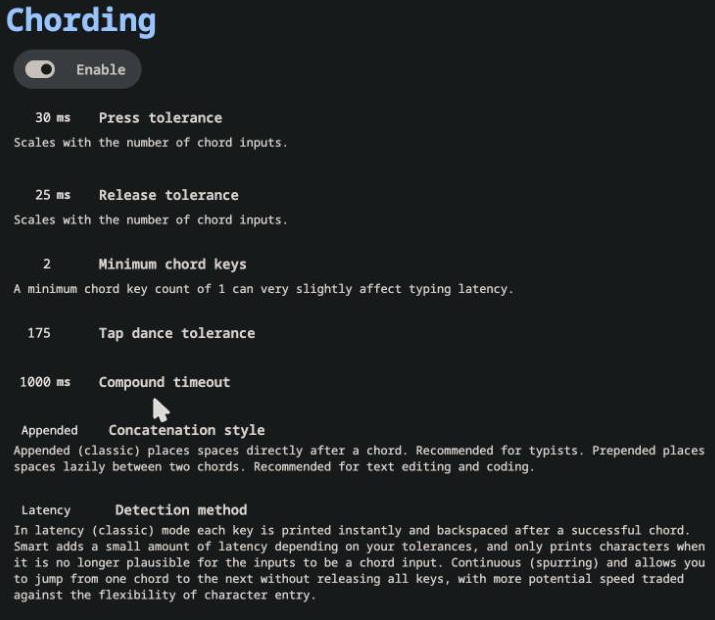
In this box, you can adjust settings relating to CCOS’ chording abilities as well as turn off chording altogether, should you choose to.
Enable
Turns chording off entirely. With it off, CCOS falls back to typing one letter at a time – what the CharaChorder community calls “chentry” (character entry). This can be useful when you want to avoid accidentally triggering chords, such as while gaming.
If your CCOS device suddenly loses its chording ability, it’s a good idea to check if this setting is toggled off.
Device |
Default |
Min. Value |
Max. Value |
Increments |
|---|---|---|---|---|
CharaChorder One |
1 |
0 |
1 |
1 |
CharaChorder Lite |
1 |
0 |
1 |
1 |
CharaChorder X |
1 |
0 |
1 |
1 |
CharaChorder Two |
1 |
0 |
1 |
1 |
CharaChorder Engine |
1 |
0 |
1 |
1 |
Master Forge |
1 |
0 |
1 |
1 |
Press Tolerance
The press tolerance refers to a window of time in which a chord can be performed, measured in milliseconds (ms). This timer is initiated upon the first “press” action of the first key in a chord and ends once the last key of the chord is pressed, or until the press tolerance runs out, whichever comes first. Read the GTM section for a more in-depth explanation.
Release Tolerance
The release tolerance refers to a window of time in which a chord can be performed, measured in milliseconds (ms). This timer is initiated upon the first “release” action of any key in a chord and ends once the chord is fully performed, or until the release tolerance runs out, whichever comes first. Read the GTM section for a more in-depth explanation.
Minimum Chord Keys
The fewest keys, pressed at the same time, that count as a chord. Setting this to 1 can very slightly affect typing latency.
Device |
Default |
Min. Value |
Max. Value |
Increments |
|---|---|---|---|---|
CharaChorder One |
2 |
1 |
12 |
1 |
CharaChorder Lite |
2 |
1 |
12 |
1 |
CharaChorder X |
2 |
1 |
12 |
1 |
CharaChorder Two |
2 |
1 |
12 |
1 |
CharaChorder Engine |
2 |
1 |
12 |
1 |
Master Forge |
2 |
1 |
12 |
1 |
Tap Dance Tolerance
Device |
Default |
Min. Value |
Max. Value |
Increments |
|---|---|---|---|---|
CharaChorder One |
175 |
0 |
1275 |
5 |
CharaChorder Lite |
175 |
0 |
1275 |
5 |
CharaChorder X |
175 |
0 |
1275 |
5 |
CharaChorder Two |
175 |
0 |
1275 |
5 |
CharaChorder Engine |
175 |
0 |
1275 |
5 |
Master Forge |
175 |
0 |
1275 |
5 |
Compound timeout
The Compound timeout determines if a compound chord succeeds or fails.
If the time between the individual chords in a compound chord is:
less than the Compound timeout, then it succeeds and the individual chords are replaced with the compound chord’s output
greater than the Compound timeout, then it fails and the individual chords remain
Detection method
There are three detection methods:
Latency (classic) mode. Each key is printed instantly and backspaced after a successful chord.
Smart adds a small amount of latency depending on your tolerances, and only prints characters when it is no longer plausible for the inputs to be a chord input.
Continuous (spurring) allows you to jump from one chord to the next without releasing all keys, with more potential speed traded against the flexibility of character entry.
Concatenation Style
Appended (classic) places spaces directly after a chord. Recommended for typists. Prepended places spaces lazily between two chords. Recommended for text editing and coding.
Device |
Default |
|---|---|
CharaChorder One |
appended |
CharaChorder Lite |
appended |
CharaChorder X |
appended |
CharaChorder Two |
appended |
CharaChorder Engine |
appended |
Master Forge |
appended |
Available options: appended, prepended
Autocorrect
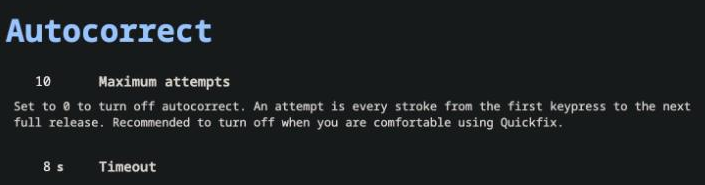
Maximum attempts
Set to 0 to turn off autocorrect. An attempt is every stroke from the first keypress to the next full release. Recommended to turn off when you are comfortable using Quickfix.
Timeout
This setting will change how long CCOS counts time in order to replace characters that precede a chord.
CCOS devices have a running timer that starts after every single character that is entered in traditional chentry (character entry, i.e. one letter at a time). This timer controls whether or not the next chord that you perform deletes the preceding characters.
This feature allows users to misfire chords, yet be able to correct them by quickly performing the chord correctly, without having to backspace manually to erase the misfired chord. The result is that the timeout will automatically backspace all of the preceding characters (up to the last breaking character) and replace them with the intended chord.
Arpeggiates
What are arpeggiates?
Arpeggiate actions are timed actions that can modify a chord after the chord is performed. A quick example of this is the use of chord modifiers after you perform the chord. You can read that section for information on how the chord modifiers work.
With arpeggiates enabled, you can chord the word run and then, within the arpeggiate timeout window, press the past tense modifier for the word to be “modified” into its past tense variant; in English, ran.
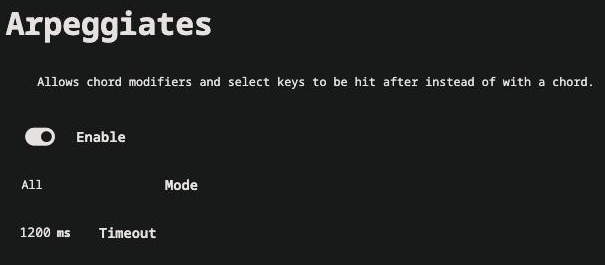
In this box, you can enable or disable arpeggiates as well as increase or decrease the arpeggiate timeout setting.
Mode
Device |
Default |
Min. Value |
Max. Value |
Increments |
|---|---|---|---|---|
CharaChorder One |
all |
— |
— |
— |
CharaChorder Lite |
all |
— |
— |
— |
CharaChorder X |
all |
— |
— |
— |
CharaChorder Two |
all |
— |
— |
— |
CharaChorder Engine |
all |
— |
— |
— |
Master Forge |
all |
— |
— |
— |
Available options: all, chord modifiers, arpeggiate chords
Leds
These settings adjust the color and brightness of the LEDs on the devices that have them: the CharaChorder Lite and the Master Forge. The Master Forge stores them per half, so each digitizer can be lit in its own color.
The GTM only offers the on/off toggle and the brightness slider. Everything below is only reachable here.
Note
Since each Master Forge half stores its own LED settings, you need to connect to each half separately to configure it – connecting to one half does not let you reach the other’s settings. Once connected, the currently connected half’s name replaces the “Connect” button at the bottom of the sidebar: M4G for the left half, M4GR for the right half.
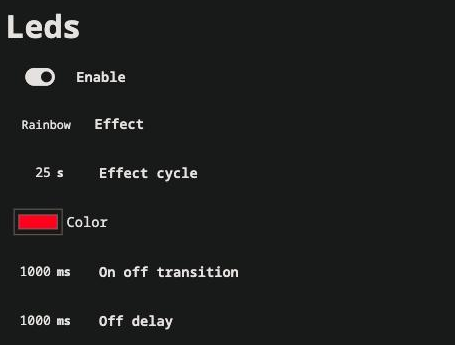
Enable
Turns the LEDs off entirely.
Color
This box is a single color picker, not separate hue, saturation and brightness fields: picking a color sets all three settings below at once.
Device |
Default |
Min. Value |
Max. Value |
Increments |
|---|---|---|---|---|
CharaChorder Lite |
0 |
0 |
65280 |
256 |
Master Forge |
0 |
0 |
65280 |
256 |
Device |
Default |
Min. Value |
Max. Value |
Increments |
|---|---|---|---|---|
CharaChorder Lite |
255 |
0 |
255 |
1 |
Master Forge |
255 |
0 |
255 |
1 |
Device |
Default |
Min. Value |
Max. Value |
Increments |
|---|---|---|---|---|
CharaChorder Lite |
255 |
0 |
255 |
1 |
Master Forge |
255 |
0 |
255 |
1 |
Effect
Chooses whether the LEDs hold a static color or cycle through the rainbow.
Device |
Default |
|---|---|
CharaChorder Lite |
rainbow |
Master Forge |
rainbow |
Available options: static, rainbow
Effect Cycle
How long one full rainbow cycle takes. Confirmed on a CharaChorder Lite: this field stays enabled and adjustable even while the Effect setting above is set to Static, though it has nothing to affect until Effect is switched back to Rainbow.
Device |
Default |
Min. Value |
Max. Value |
Increments |
|---|---|---|---|---|
CharaChorder Lite |
25 s |
0.1 s |
25.5 s |
0.1 s |
Master Forge |
25 s |
0.1 s |
25.5 s |
0.1 s |
Off delay
Confirmed on a CharaChorder Lite: the delay between turning the LEDs off and the first LED actually going dark.
Device |
Default |
Min. Value |
Max. Value |
Increments |
|---|---|---|---|---|
CharaChorder Lite |
1000 ms |
0 ms |
2550 ms |
10 ms |
Master Forge |
1000 ms |
0 ms |
2550 ms |
10 ms |
On off transition
Confirmed on a CharaChorder Lite: once the first LED has changed state, how long the rest take to follow it one by one, whether that is fading out until every LED is off or fading in until every LED is lit.
Device |
Default |
Min. Value |
Max. Value |
Increments |
|---|---|---|---|---|
CharaChorder Lite |
1000 ms |
0 ms |
2550 ms |
10 ms |
Master Forge |
1000 ms |
0 ms |
2550 ms |
10 ms |
Misc
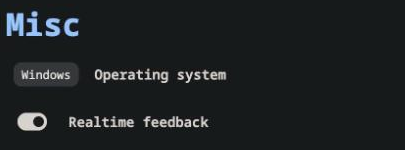
Here you can select your device’s operating system and toggle realtime feedback on or off.
USB
These settings are experimental. They are not in the GTM, so the Device Manager and the Serial API are the only ways to change them.
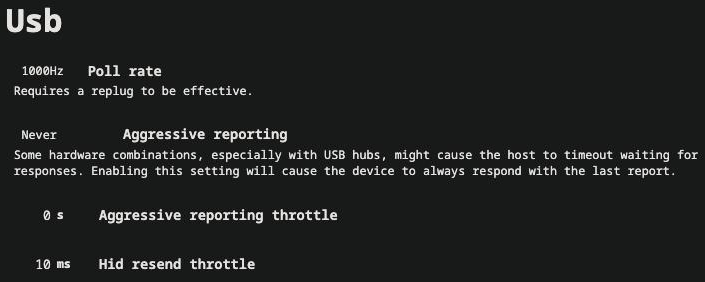
Poll Rate
The polling rate (poll rate) is the frequency at which the device sends its input reports to the computer it is connected to, expressed in Hz (Hertz). At 1000 Hz the device reports 1000 times every second.
Changing this setting requires unplugging and replugging the device before it takes effect.
This setting arrived in CCOS 2.2.0, replacing the separate mouse and keyboard poll rate settings. Those older settings did not actually change the poll rate.
Device |
Default |
|---|---|
CharaChorder One |
1000Hz |
CharaChorder Lite |
1000Hz |
CharaChorder X |
1000Hz |
CharaChorder Two |
1000Hz |
CharaChorder Engine |
1000Hz |
Master Forge |
1000Hz |
Available options: 1000Hz, 500Hz, 250Hz, 125Hz
Aggressive Reporting
Some hardware combinations, especially with USB hubs, might cause the host to time out waiting for responses. Enabling this setting will cause the device to always respond with the last report.
Device |
Default |
|---|---|
CharaChorder One |
never |
CharaChorder Lite |
never |
CharaChorder X |
never |
CharaChorder Two |
never |
CharaChorder Engine |
never |
Master Forge |
never |
Available options: never, active only
Aggressive Reporting Throttle
Device |
Default |
Min. Value |
Max. Value |
Increments |
|---|---|---|---|---|
CharaChorder One |
0 s |
0 s |
25.5 s |
0.1 s |
CharaChorder Lite |
0 s |
0 s |
25.5 s |
0.1 s |
CharaChorder X |
0 s |
0 s |
25.5 s |
0.1 s |
CharaChorder Two |
0 s |
0 s |
25.5 s |
0.1 s |
CharaChorder Engine |
0 s |
0 s |
25.5 s |
0.1 s |
Master Forge |
0 s |
0 s |
25.5 s |
0.1 s |
Hid Resend Throttle
Device |
Default |
Min. Value |
Max. Value |
Increments |
|---|---|---|---|---|
CharaChorder One |
10 ms |
10 ms |
2550 ms |
10 ms |
CharaChorder Lite |
10 ms |
10 ms |
2550 ms |
10 ms |
CharaChorder X |
10 ms |
10 ms |
2550 ms |
10 ms |
CharaChorder Two |
10 ms |
10 ms |
2550 ms |
10 ms |
CharaChorder Engine |
10 ms |
10 ms |
2550 ms |
10 ms |
Master Forge |
10 ms |
10 ms |
2550 ms |
10 ms |
Backup
There are different kinds of backups that you can create on the Device Manager – of your chords, your layout, or even your settings – and we’ll cover all of them below. These backups are made using the “Backup” box below.
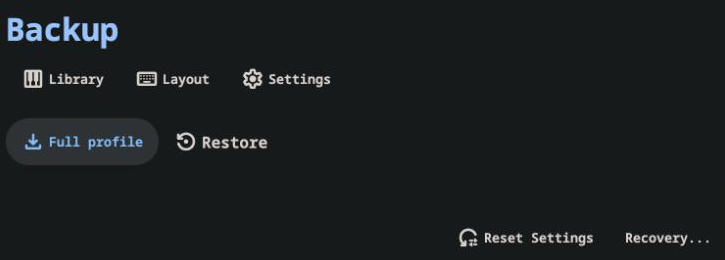
This box lets you export your library, layout, or settings individually, download or restore a full profile backup, reset your device to factory settings, or enter recovery mode.
Creating a Backup
Note
In order to follow these steps, you must already have your device connected to the device manager.
Open the Settings tab and scroll down to the “Backup” box.
Choose an individual “Library”, “Layout” or “Settings” backup to download to your computer, or select “Full profile” to download a single file with all three parts. The file(s) will be downloaded in .json format.
Note
You can make individual backups of just your chords, just your layout, or just your settings. The “Full profile” option will download all three of these in a single file instead of three separate files.
If prompted, select a location to save to on your computer and rename the file to your liking.
Congratulations! Now you have created a backup.
Restoring from a Backup
Additionally, you can restore your chords, your layout, and your settings on the Device Manager. Follow the steps below to do so.
Note
In order to follow these steps, you must already have your device connected to the device manager.
Open the Settings tab and scroll down to the “Backup” box.
Click on “Restore”.
Select a file to use to restore from. This file should be in .json format.
Note
Files that you can restore from will have been created ahead of time by following the steps to create a backup.
If there are changes, the apply button will appear on the top left. Note the changes in the appropriate tab. If you restored chords, check the chords tab, if you restored a layout, check the layout tab, and if you restored settings, check the settings tab.
Note
The restore feature does NOT erase data from your device. If there is a conflict (such as a changed setting, a different key in the layout, or a chord that has a different output), that will be overwritten by the restore file. Settings and layout backups ALWAYS overwrite everything.
Once you see the changes that the restore file made, you can click apply to apply the changes.
Library
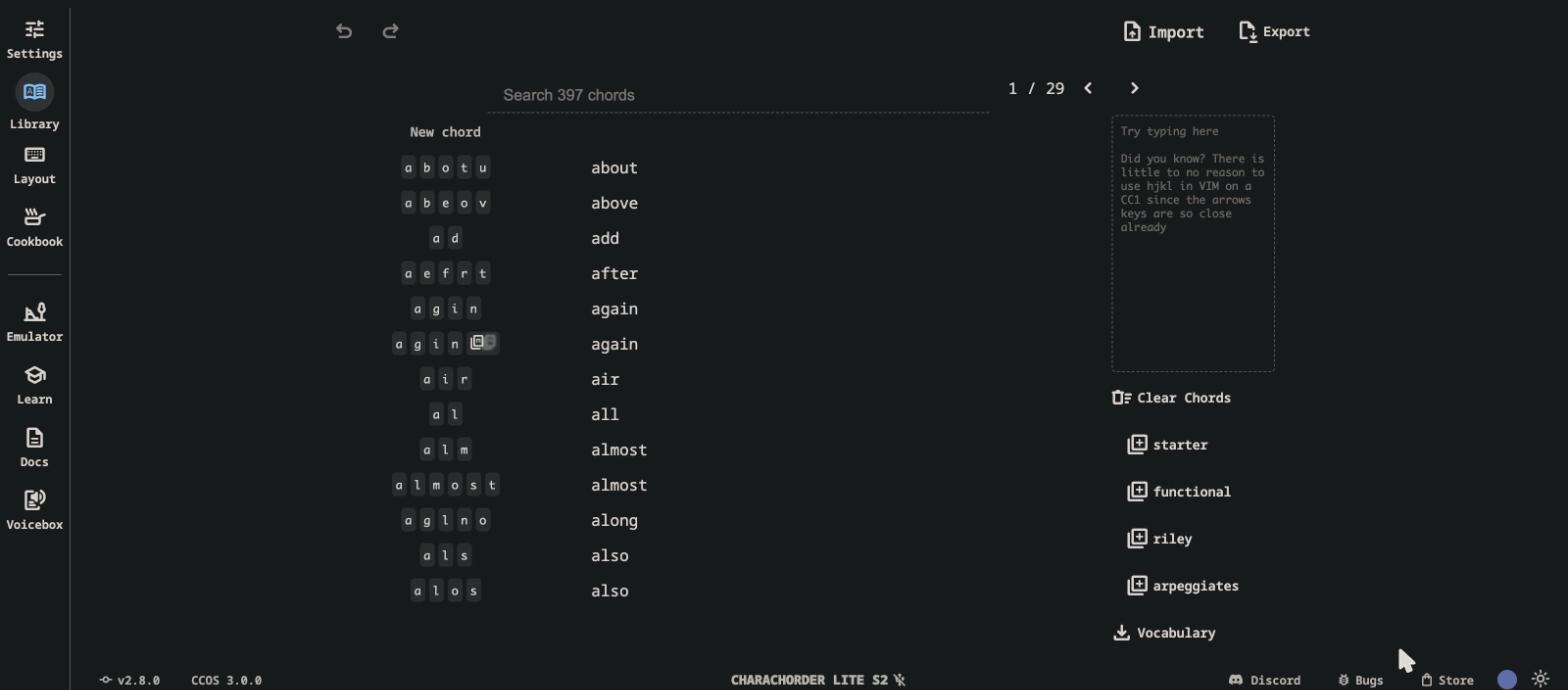
The Library is a powerful tool that lets you add, delete and edit chords stored in your chord library. It’s easy to use and quick to load. We’ll go over how to use it below.
When you connect your device to the device manager, the webpage will start reading the chords on your device. It may take a couple of seconds — or even over a minute for very large libraries — to load the first time. Reconnecting a device you’ve connected before, e.g. via the Recent Devices list, loads much faster.
Chords displayed here are shown in alphabetical order, using the list of chord outputs. The number of chords shown on the library depends on your screen size and browser zoom settings. Above the chords list, you’ll see the search bar which will display the number of chords on your CCOS device until something is typed there.
You can search through your chords by searching chord outputs (the word that displays once you’ve performed a chord). This textbox is not case sensitive, so you can type in capital or lowercase letters regardless of whether or not the chord has a capital letter in it. This search bar is also intuitive enough that you are also able to search partial words/phrases.
To the right of the search bar, you’ll find two numbers separated by a forward slash (/). These numbers indicate the page number that you’re on out of the total number of pages that compose your chord library. Using the angle brackets to the right of those numbers will allow you to flip through the different pages of your chord library which is sorted in alphabetical order.
Under the page-turning brackets, you’ll see a tall box with the text “Try typing here”. You can use this text box to test your new chords as you edit them in the manager.
Under the text box if your device supports it you can find some shortcuts to help you clear your chord library, add back in the starter chords that came on your device, add functional utility chords, and download a text file with all of your chord outputs separated by a pipe character for importing into practice tools.
Finally, at the bottom of the page, if you hover over the Device name you’ll notice that you can hold Shift and click on it to “Sync”. If you do this, it will have the device manager read your device’s chord library again. This process can take a few seconds.
Creating a Chord
You can follow the steps below to create a new chord on the device manager.
Note
In order to follow these steps, you must already have your device connected to the device manager.
Find the “New chord” text under the search bar and click it.
When the text displays “Hold chord,” press and hold all of the keys that you want to use as your chord input. Once you have pressed all of the keys, release the keys.
You will now see the chord input in the left column as letters inside individual boxes. These boxed-letters will be highlighted in a color (as opposed to black or white). The color depends on your selected color scheme. You will also notice a single, floating dot highlighted in the same color off to the right of the boxed-letters.
Note
You can add any number of chords at a time without defining the desired chord output.
Warning
If you click apply, before defining a chord output as described in step three, any chords that you’ve created will save to your device with a blank output and will lead to strange behavior.
Click into the text box to the right of the chord input that you created in the previous step and type your desired chord output.
Using Action Codes
As you type your chord output, you’ll notice that your cursor will have a bubble with a
+above it. You can click this to open the action codes menu where you can search for specific action codes or browse through the action codes available to assign into a chord output. Read the action codes section for information on the different kinds of action codes.As you type, you’ll notice that your text has changed color to match your color scheme and that the end of your text has a floating dot immediately to the right.
Once you are satisfied with your output, you can proceed to modify another chord or click apply.
Deleting a Chord
You can follow the steps below to delete a chord in the device manager.
Note
In order to follow these steps, you must already have your device connected to the device manager.
Locate the chord that you would like to delete.
When you hover over the chord that you would like to delete, you will notice a small trash icon appear in line with that chord map. Click the trash icon in order to mark it for deletion.
When you click the trash icon, the boxed-letters in the left column will have a line through them and they will turn red. You can unmark chords for deletion by clicking the “undo” arrow next to the trash icon. The chord will return to its original color and the line will disappear.
Tip
You can mark multiple chords for deletion at a time. Flipping through the pages in your chord library will not unmark the chords that you have marked for deletion.
Once you have marked the undesired chords for deletion and are ready to delete them, click the apply button.
Once you click save, the marked chord maps will disappear from the list.
Editing a Chord
You can follow the steps below to edit an existing chord in the device manager.
Note
In order to follow these steps, you must already have your device connected to the device manager.
Locate the chord that you would like to edit.
Click the textbox in the right column where the chord output is displayed.
Edit the chord output to be whatever you would like. As you type, you will notice that the text changes color to match your color scheme and that the end of your text has a floating dot immediately to the right.
Using Action Codes
As you type your chord output, you’ll notice that your cursor will have a bubble with a
+above it. You can click this to open the action codes menu where you can search for specific action codes or browse through the action codes available to assign into a chord output. Read the action codes section for information on the different kinds of action codes.Tip
You can edit multiple chords before applying your changes. Flipping through the pages in your chord library will not undo the changes that you have made to your existing chords.
Once you are ready to apply your changes, click apply.
Once you click apply, the chord(s) that you’ve modified will change color to match the rest of the list and the floating dot will disappear.
Layout
The Device Manager has a very intuitive layer editor. It’s the third option in the main navigation bar at the left of the page. When you go to this tab, you’ll see a diagram of your device, with each key filled in with the corresponding action code.
Layer Selector
Explanation of Layers on CCOS Devices
As of CCOS 3.0.0, CCOS devices come with four (4) layers that you can make use of: the base layer, called the A1 (Alpha) layer, the secondary layer, referred to as A2 (Numeric), the tertiary layer, named A3 (Function), and the quaternary layer, named A4 (Flag).
In order to access layers, you need to press and hold a “layer access” button. You MUST hold the button in order to use keys mapped to layers other than the alpha layer. The alpha layer is active by default.
Note
In this section, we’ll refer only to the default layouts on CCOS devices. If you have modified your layout to something different, then the next portion might not be accurate for your device. If you have purchased your device from CharaChorder, then the following is accurate to your device.
A1 Layer
The A1 layer, also known as the alpha layer, is the main layer that is active by default. Your device will always be in the A1 layer upon boot.
A2 Layer
The A2 layer, sometimes referred to as the numeric layer, is accessible with the A2 access key. In the Device Manager, this key has the name “Numeric Layer (Left)” and “Numeric Layer (Right)”, one for each hand.
The A2 Layer is accessible by pressing and holding one layer access button. Any key that is mapped to the A2 Layer can only be accessed by pressing and holding the A2 Layer access key along with the target key. You do not need to chord the keys together; it’s only required that the A2 Layer access key is pressed while the target key is pressed.
A3 Layer
The A3 layer, sometimes referred to as the “function layer”, is accessible with the A3 access key. In the Device Manager, this key is assignable by the names “Function Layer (Left)” and “Function Layer (Right)”.
Once you’ve mapped the A3 layer access buttons, the A3 Layer is accessible by pressing and holding either one of them. You do not have to hold them both in order to access the A3 layer. Any key that is on the A3 Layer can only be accessed by pressing and holding the A3 access key, along with the target key. You do not need to chord the keys together; it’s only required that the A3 layer access key is pressed while the target key is pressed.
A4 Layer
The A4 layer, also known as the “Flag” layer, is accessible with the A4 access key, named “Flag Layer” in the Device Manager’s action codes menu (one entry for the left hand, one for the right, both sharing that name). It works the same way as the A2 and A3 layers: press and hold the A4 layer access key while pressing the target key.
Unlike A1-A3, the A4 layer has no keys mapped by default – every key starts out set to “No Action” – so on a factory-default layout you’ll need to assign an A4 access key and remap the layer yourself before it does anything.
Note
The following section assumes that you have already connected your device to the device manager.

Above the diagram of your device, you’ll see a row of tabs – A1, A2, A3, A4 – plus a circular icon. Click any tab to view and edit the keys mapped to that layer. The circular icon resets the currently selected layer back to its factory default; it doesn’t undo edits to other layers.
Note
The tab labels change to match whichever profile is currently selected – for example, they read B1-B4 while profile B is selected.
Profile Selector
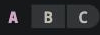
Near the top of the page, next to the Apply button, you’ll see three buttons labelled A, B, and C – the profile selector. Each profile has its own independent set of four layers (so profile A has layers A1-A4, profile B has B1-B4, and profile C has C1-C4) and its own settings; the chord library is shared across all three profiles. Clicking a letter here switches which profile you’re viewing and editing in the Device Manager.
To switch the active profile on the device itself, assign the “Profile A”, “Profile B”, or “Profile C” action to a key or chord through the action codes menu (all three are listed under the “Modifiers” category).
Remapping
On the layer editor, you can remap your layout by using action codes. Follow the instructions below to remap your device one key at a time.
How to Remap Your Keys
Note
In order to follow these steps, you must already have your device connected to the device manager.
Choose the layer where you want to change the key.
Click on the key that you would like to change. This will bring up the action codes menu.
Use the search feature in the action codes menu or scroll through available action codes. Once you’ve found the desired action code, click on it.
Once you select the action code, you will notice that the layout diagram now reflects the selected action code highlighted according to your color scheme and it will be accompanied by a floating dot.
Once you have changed the desired key(s), click the apply button.
Using Action Codes
You can use action codes in chord outputs as well as while remapping keys.
What are Action Codes
Action codes are data that CCOS interprets as characters. Put simply, they are the characters that we see while typing. These include letters, numbers, special characters, function keys, and others.
Available Action Codes
You can view the action codes.